
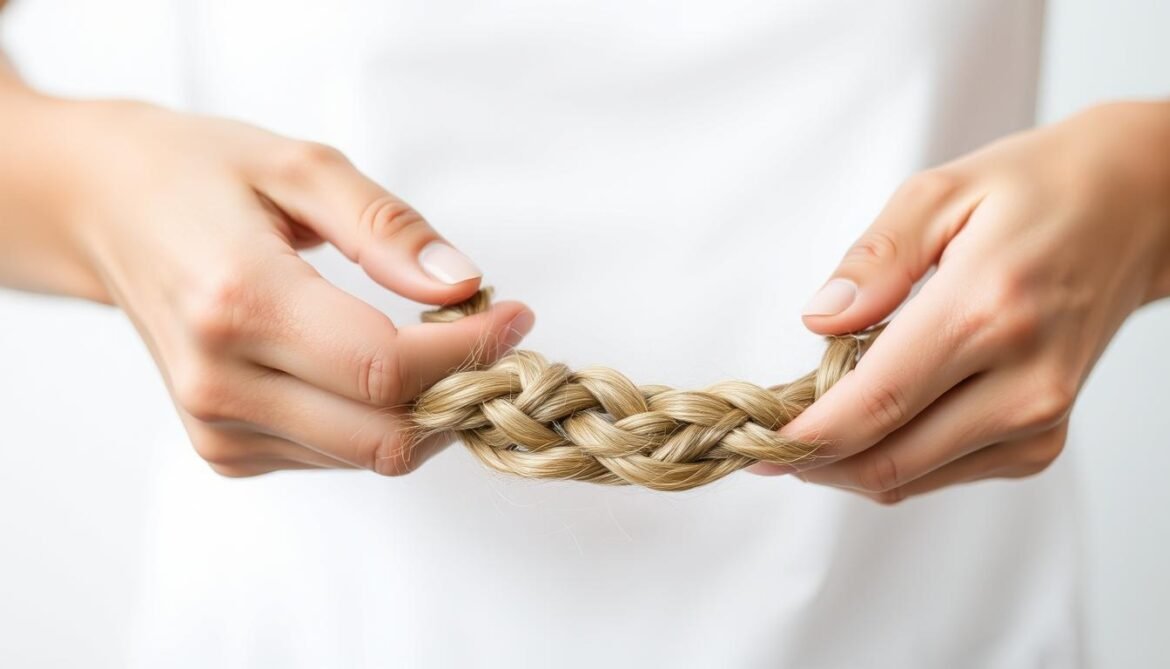

Mastering braiding techniques can elevate your hairstyling skills, offering a wide range of beautiful and intricate designs. Whether you’re a beginner or looking to refine your skills, hair braiding is a versatile skill that can be applied to various occasions, from casual daily looks to more formal events.
For those new to hair braiding for beginners, this guide will walk you through the basics and beyond, providing a comprehensive step-by-step approach to achieving stunning braids. With practice, patience, and the right guidance, anyone can become proficient in creating beautiful braids that suit different hair types and styles.
Key Takeaways
- Learn the fundamental braiding techniques to enhance your hairstyling skills.
- Understand the basics of hair braiding suitable for beginners.
- Discover step-by-step guides to creating various braids for different occasions.
- Explore tips for adapting braids to different hair types and styles.
- Practice and refine your braiding skills with patience and the right guidance.
The Basics of Hair Braiding
Before diving into complex braids, it’s essential to grasp the basics of hair braiding. Understanding these fundamentals will make it easier to master various techniques and styles. At its core, braiding involves intertwining strands of hair to create a desired pattern or design.
Essential Tools for Braiding
To start braiding, you’ll need a few essential tools. These include a wide-tooth comb or a detangling brush for gently teasing out tangles, a clear surface to work on, and some hair elastics or small clips to secure your braids. Some braiders also swear by using a light-hold hairspray or a texturizing spray to add grip to the hair, making it easier to braid.
| Tool | Purpose |
|---|---|
| Wide-tooth comb or detangling brush | Gently detangle hair before braiding |
| Hair elastics or small clips | Secure braids in place |
| Light-hold hairspray or texturizing spray | Add grip to hair for easier braiding |
Preparing Your Hair for Braiding
Preparing your hair is a crucial step in the braiding process. Start by washing and conditioning your hair as you normally would. Towel-dry your hair until it’s damp, then apply a leave-in conditioner or a styling product to enhance manageability. For most braids, it’s best to work with hair that’s not too clean, as it tends to be more grippy. However, the ideal hair condition can vary depending on the type of braid you’re attempting.
“The key to a great braid is not just the technique, but also the preparation of the hair.”
By understanding the basics of hair braiding, including the necessary tools and how to prepare your hair, you’ll be well on your way to creating beautiful, intricate braids that last.
How to Braid Hair? The Classic Three-Strand Braid
Mastering the classic three-strand braid is a fundamental skill for anyone looking to enhance their hairstyling abilities. This timeless technique is not only easy to learn but also versatile, suitable for various occasions and hair types.
Step-by-Step Instructions
To start, brush your hair to remove any tangles or knots. Then, take a small section of hair from the crown of your head and divide it into three equal parts. Begin a regular braid by crossing the right strand over the middle strand, then the left strand over the middle strand.
Continue braiding by repeating the process, gently pulling the strands taut to tighten the braid as you go. To incorporate more hair into the braid, simply add a small section to the right strand before crossing it over the middle, and do the same on the left side before crossing it over.
As you braid, keep the tension even and not too tight, as this can cause discomfort. When you reach the end of your hair, secure the braid with a small elastic band.
Common Mistakes to Avoid
One of the most common braiding mistakes is starting with tangled or knotty hair, which can lead to a messy braid. Always brush your hair before you begin.
Another mistake is braiding too tightly, which can be painful and even lead to hair loss over time. Keep the tension gentle but firm.
- Start with clean and brushed hair.
- Keep the braid loose for a more relaxed look or tighten it for a neater appearance.
- Practice makes perfect; don’t be discouraged if it takes a few tries to get the hang of it.
By following these steps and avoiding common pitfalls, you’ll be well on your way to mastering the classic three-strand braid, a skill that opens the door to more intricate and beautiful hairstyles.
Mastering the French Braid
With its intricate weaving, the French braid adds a touch of refinement to any look. It’s a versatile hairstyle suitable for both casual and formal occasions. Mastering this technique can seem challenging, but breaking it down into simpler steps makes it more manageable.
French Braid Technique Breakdown
To start a French braid, begin by brushing your hair to remove any tangles or knots. Take a small section of hair from the crown of your head and divide it into three equal parts. Begin a regular braid by crossing the right strand over the middle strand, then the left strand over the middle strand. To continue the French braid, you’ll drop the right strand and pick up a new section of hair right next to it, then cross the new right strand over the middle strand. Repeat this process on the left side. The key is to gently incorporate new hair into the braid as you go, keeping the tension even.
As you practice, you’ll become more comfortable with the motion and the amount of hair to pick up for each new strand. It’s essential to be patient, as it might take a few attempts to get the hang of it. Consistency is key to achieving a smooth, even braid.
Tips for a Perfect French Braid
To achieve a flawless French braid, start with clean, brushed hair. Using a comb or a detangling brush can help in achieving a smoother braid. Take your time and work gently, as rough handling can lead to tangles and unevenness. For a neater braid, you can gently tug on the edges of the braid to tighten it, but be cautious not to pull too hard, which can cause the braid to come undone.
Variations of the French Braid
Once you’ve mastered the basic French braid, you can experiment with variations. One popular variation is the side French braid, which adds a touch of asymmetry to your look. Another is the double French braid, where you create two braids, one on top of the other, for a more intricate look. You can also incorporate braiding tips like adding some texture with a texturizing spray or weaving in small accessories for a personalized touch.
Creating the Dutch Braid
The Dutch braid, a trendy and versatile hairstyle, has gained popularity for its unique, inside-out braiding technique. This style, also known as the “inside out braid,” offers a fresh and intricate look that’s perfect for both casual and formal occasions.
Dutch Braid vs. French Braid: Key Differences
The Dutch braid is often compared to the French braid due to their similarities, but they have distinct differences. While the French braid involves crossing strands of hair over each other, the Dutch braid involves crossing strands under, creating a more textured and voluminous appearance. This technique gives the Dutch braid a 3D-like effect, making it stand out from the traditional French braid.
Another key difference lies in the braiding process. For a French braid, you start by crossing the right strand over the middle strand, then the left strand over the middle. In contrast, a Dutch braid involves crossing the right strand under the middle strand, followed by the left strand under the middle. This under-crossing technique is what sets the Dutch braid apart and gives it a more intricate look.

Step-by-Step Dutch Braid Tutorial
To master the Dutch braid, start by brushing your hair to remove any tangles or knots. Then, take a small section of hair from the crown of your head and divide it into three equal parts. Begin a regular braid by crossing the right strand under the middle strand, then the left strand under the middle strand. Continue this process, adding more hair to each strand as you go, to create a seamless and intricate braid.
As you braid, gently pull on the edges of the braid to loosen it and create a fuller look. To finish, secure the end with a small elastic band. Practice makes perfect, so don’t be discouraged if it takes a few tries to get the hang of it.
Styling Ideas for Dutch Braids
The Dutch braid is versatile and can be styled in various ways. Try incorporating it into a bohemian-inspired look by pairing it with loose waves or a flowy sundress. For a more polished look, you can create a Dutch braid updo by twisting the braid into a bun and securing it with bobby pins. Experimenting with different styling options can help you find the perfect look for any occasion.
“The Dutch braid adds a touch of elegance to any hairstyle, making it perfect for weddings, festivals, or everyday wear.”
The Fishtail Braid: A Detailed Guide
Mastering the fishtail braid can elevate your hairstyling skills and add a touch of elegance to your everyday look. This intricate braiding style, while appearing complex, can be achieved with practice and the right technique.
Breaking Down the Fishtail Technique
The fishtail braid involves crossing small sections of hair over and under each other, creating a fishbone-like pattern. To start, divide your hair into two equal sections. Then, take a small piece from the outer side of one section and cross it over to the inner side of the other section. Repeat this process on the other side, taking a small piece from the outer side and crossing it over to the inner side of the opposite section.
Continue this pattern, gently pulling on the edges of the braid to loosen it and create a more relaxed, voluminous look. The key to a neat fishtail braid is to take small, uniform sections of hair and to gently tighten the braid as you go.
Troubleshooting Your Fishtail Braid
Common issues with fishtail braiding include uneven sections, tangled hair, and a braid that comes undone. To avoid unevenness, ensure that you’re taking equal amounts of hair from each side. If your hair tends to tangle, try braiding it when it’s damp or using a detangling spray.
If your fishtail braid keeps coming undone, try securing it with a small elastic band at the end or using a light-hold hairspray to keep everything in place.
Creating a Messy Fishtail Braid
For a more undone, messy fishtail braid, gently tug on the edges of the braid to loosen it. You can also pull out a few strands around your face to frame it and add to the undone look. This style is perfect for a casual, everyday look or can be dressed up for a more formal occasion.
To enhance the messy look, try using a texturizing spray or dry shampoo to add volume and grit to your hair before braiding.
Braiding for Different Hair Types and Lengths
Braiding techniques can be tailored to suit different hair textures and lengths, ensuring everyone can enjoy a beautiful braid. Whether you’re dealing with short hair, curly locks, fine strands, or hair with extensions, there’s a braiding technique to suit your needs.
Braiding Short Hair
Braiding short hair requires some creativity, but it’s definitely possible to achieve stylish looks. For short hair, consider using smaller braiding sections and tighter braids to create a more defined look. Micro braids or French braids starting from the crown can be particularly flattering.

Techniques for Curly and Textured Hair
Curly and textured hair can add a beautiful dimension to braids. To enhance your natural texture, use a curl-defining cream before braiding. For curly hair, gently detangle your hair before braiding to minimize tangles. Dutch braids and fishtail braids are great options as they add volume and emphasize the texture.
Working with Fine or Thick Hair
Fine hair can be braided using gentle, lightweight braiding techniques to avoid weighing the hair down. For thick hair, you can create more intricate braids by dividing the hair into larger sections. Using the right braiding products can also help in managing and styling both fine and thick hair effectively.
Braiding Extensions and Added Hair
When braiding hair with extensions or added hair, it’s essential to blend the natural hair with the extensions seamlessly. Use a braiding technique that incorporates both your natural hair and the extensions to create a cohesive look. This can include box braids or Senegalese twists for a stylish and protective hairstyle.
| Hair Type | Recommended Braid | Tips |
|---|---|---|
| Short Hair | Micro Braids, French Braids | Use smaller sections for a defined look |
| Curly/Textured Hair | Dutch Braids, Fishtail Braids | Enhance curls with curl-defining cream |
| Fine Hair | Gentle Braids | Avoid heavy braiding products |
| Thick Hair | Intricate Braids | Divide hair into larger sections |
| Hair with Extensions | Box Braids, Senegalese Twists | Blend natural hair with extensions |
Creative and Advanced Braiding Styles
For those looking to elevate their braiding skills, exploring advanced techniques can unlock a world of creative hairstyles. Advanced braiding is not just about following a pattern; it’s about understanding how to manipulate hair to create stunning designs.
One of the most captivating advanced braids is the waterfall braid. It’s a technique that gives the illusion of hair cascading down the back, creating a beautiful, intricate look.
Waterfall Braid Tutorial
To achieve a waterfall braid, start by taking a small section of hair and dividing it into three strands. Begin a regular braid, but after crossing the right strand over the middle, drop the right strand and pick up a new section right next to it. Repeat on the left side, and continue this pattern, dropping the bottom strand each time and picking up a new one.
Crown Braid Step-by-Step
The crown braid is a regal hairstyle perfect for special occasions. It involves braiding a section of hair and then wrapping it around the crown of the head, securing it with bobby pins. Start with a Dutch braid or a regular braid, then gently wrap it around the head, tucking the end under the rest of the hair.
Rope Braid Technique
The rope braid is another advanced technique that looks complex but is relatively simple once you get the hang of it. It involves twisting two strands of hair together, then twisting the twisted strands around each other.
Combining Multiple Braiding Techniques
For a truly unique look, try combining different braiding techniques. For example, you can start with a fishtail braid at the crown, transition into a Dutch braid, and finish with a regular three-strand braid. The key is to experiment and find what works best for your hair type and style.
| Braid Type | Difficulty Level | Best For |
|---|---|---|
| Waterfall Braid | Advanced | Special Occasions |
| Crown Braid | Advanced | Weddings, Formal Events |
| Rope Braid | Intermediate | Everyday Wear, Casual Events |
Braided Hairstyles for Special Occasions
Braids are a versatile and stylish choice for any special event, offering a range of options from simple to elaborate. Whether you’re looking for a sophisticated look for a wedding or a chic style for everyday wear, braided hairstyles can meet your needs.
Elegant Braided Updos
Elegant braided updos are perfect for formal events. They can be styled in various ways, such as a classic braided bun or a more intricate twisted braided updo. These styles not only keep your hair off your face but also add a touch of sophistication to your overall look.
To create an elegant braided updo, start by braiding your hair into a desired style, then twist it into a bun and secure it with bobby pins. You can also add some decorative hairpins to give your look a more polished finish.
Braids for Weddings and Formal Events
Weddings and formal events are occasions where braided hairstyles truly shine. A beautifully braided hairstyle can complement your wedding dress or formal attire, making you stand out in a crowd. Popular choices include the fishtail braid and the Dutch braid, both of which offer a unique and captivating look.
| Braided Style | Occasion | Skill Level |
|---|---|---|
| Fishtail Braid | Weddings, Formal Events | Intermediate |
| Dutch Braid | Weddings, Everyday Wear | Advanced |
| Classic Three-Strand Braid | Everyday Wear, Casual Events | Beginner |
Quick Braided Styles for Everyday Wear
Not all braided styles need to be elaborate or time-consuming. For everyday wear, you can opt for simpler braids like the classic three-strand braid or a messy fishtail braid. These styles are quick to create and can add a touch of elegance to your daily look.
To keep your braids looking fresh throughout the day, consider using a light-hold hairspray and securing any stray hairs with bobby pins.
Conclusion
With the step-by-step guides and techniques outlined in this article, you’re well on your way to achieving a braiding conclusion that ties together your newfound skills. From the classic three-strand braid to more intricate styles like the Dutch and fishtail braids, mastering braids is now within your grasp.
As you’ve learned, different hair types and lengths require unique approaches to braiding. Whether you’re working with short hair, curly textures, or fine locks, the key to success lies in adapting your technique to suit your hair’s needs. By practicing the various styles and techniques covered, you’ll become proficient in creating a range of braided looks, from elegant updos to quick, everyday styles.
The world of braiding is vast and creative, offering endless possibilities for self-expression. As you continue to hone your skills, don’t be afraid to experiment with new styles and techniques, combining different methods to create truly unique looks. With patience and practice, you’ll be mastering braids in no time, unlocking a world of hairstyling possibilities.